
More Vectors (Hail to the Vectors, Go Blue!)
- Christianne Myers
- Apr 12, 2019
- 4 min read

Updated: Apr 12, 2019
I'm gaining comfort with creating and manipulating vector files. Today I carved another lino block and fully documented the process so I can integrate it into my Costume Crafts course next winter term. So, a few details are redundant from my earlier post, but I want all the information in one place.
Another way to create a repeated pattern is with a block printing technique. You can carve wood or linoleum blocks with a unique, repeatable pattern.
The CNC Milling machine in the Duderstadt is called Carvey, by Inventables. The file you send to the machine is finally created in their proprietary web-based (clunky) program in Easel.
This is a one color per block process, so start with a hard edged graphic image to begin with. Unlike block printing for paper, typically for fabric, we do not want a hard edge, with a defined border or edge.

This image is called Tributaries, from the BioArtography program.
Import the image into a drawing program for any adjustments. Carvy needs an uncarved L shaped space in the lower left corner to clamp to the block, so include that into your design. For this example, I imported the image into AutoCad Sketchbook and simply traced it with pen and flooded it black, below. I added the L shaped area (~ ¾” wide and 3” on each side) and colored it in as well.

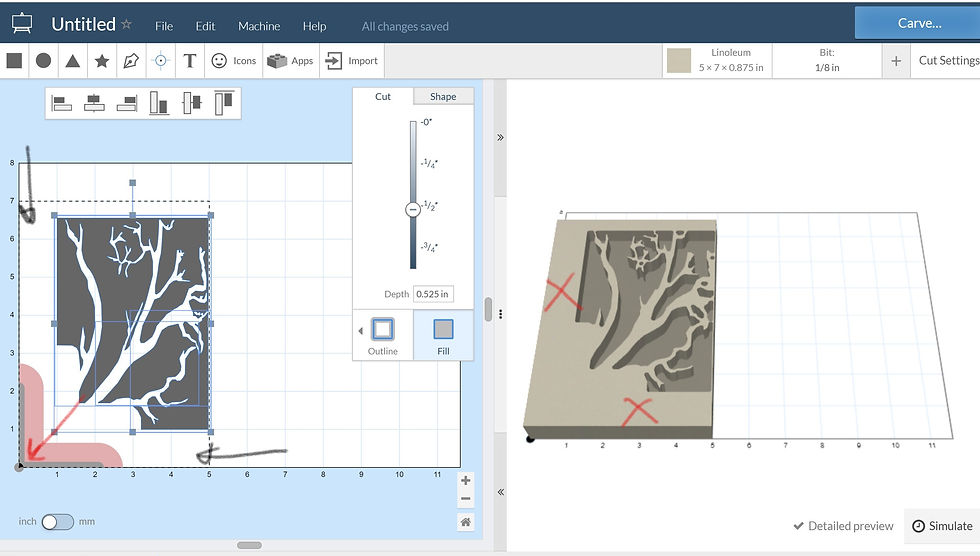
Now you are ready to import the image into Easel. Select Import->Image Trace
On the file upload screen, there are several settings you can adjust: The threshold is how specific the trace is; move the slider and see the image change on the left. Likewise, smoothing- the higher the number, the smoother the line. Since I did most of my editing before importing, I have the Threshold set high, and since I like the rough quality of a lino print, I have the Smoothing set low.

I’ve also Inverted the image as I want the printed portion to be the branches and the negative space to be unpainted fabric. If I wanted the branches to be unpainted and have a rectangle of negative space to be painted then I would un-check “Invert” (of course, this wouldn’t even work because the L shaped clamp space needs to remain an un-carved area). Once your settings are set, hit the green import button.
Either before or after you import the image you need to let Easel know what you are cutting and the size. The dimensions for this project are 5”x 7”x.875.”
In order to manipulate the imported trace in any way, you must select Edit->Select All
This will identify all the different vectors. When the image is imported, it’s tucked into the upper right corner in order to avoid the clamp, so I adjusted the layout.
SHAPE- for this project, I selected the lower left position and set the X & Y margins to 0.00” and changed the size to 5”x 7”.
CUT- Critical step- I adjusted the depth to .025” (could even go a touch smaller). This is the depth the bit will dig into the block; any deeper and it will start digging up wood pulp, removing chunks of lino, and generally making a hot mess. Next, the Cut Settings are set. I overrode the Recommended, by selecting Custom and changed the feed rate to 40; plunge rate to 12; depth to .03”
Choosing the Bit- For the lino I needed an ⅛” straight cut bit. Selecting “simulate” on the lower right shows the path of the drill.
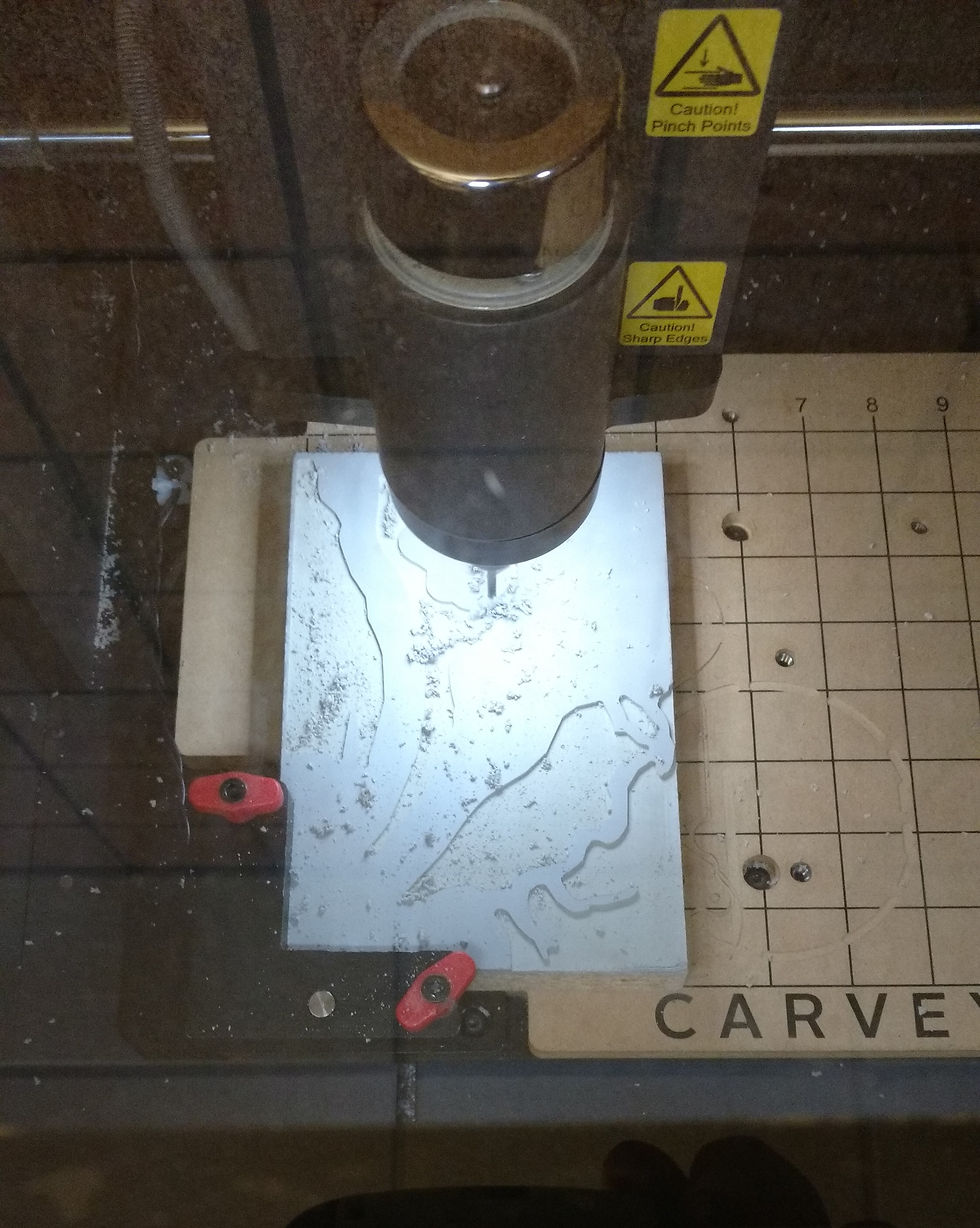
Next, it’s time to install the lino block into Carvey: Loosen the long red twist screws on the L clamp to loosen it. Lift the top plate of the clamp and place the block firmly into the lower left corner. Place the top clamp piece and tighten the screws so the block is securely placed and doesn’t wiggle at all. With the corner secured, there is no additional clamping needed. The machine will not let you carve anything under the clamp. In fact, it won’t ignore it...it will just shut down your file from carving until you’ve removed the vector in the way.

Now we're ready to CARVE! Click the Carve button on the upper right corner. This will open a few dialogue boxes confirming the security of the clamp and the over depth of the material. Proceed!
The software will give you a time estimate (this example took about 18 mins). It’s very messy, so to avoid tripping the bit up (or breaking it like I did!) I periodically lifted the lid of Carvey and vacuumed up the leavings. Lifting the lid stops the machine instantly. So even if after it starts carving you wish to make a depth adjustment, you can lift the lid, stop the machine, and change the depth number which will take effect at the next vector.
To complete the block, I hand carved into the clamped area to remove the excess. On my example, you can see where I removed a weird little edge across the top as well as extending the branches into the clamp area. You can also see that even with a .025” depth, the bit still dug up a little wood on the upper right corner. I’ll seal that corner with some glue or gesso.
Ready to paint!

Comments